Vincent Van Gogh~1st artist in Art Literacy for 2019-2020 School year!
(Calendar is at end of Post)
Please look at it before emailing or texting me to schedule a day to present
Here is the PowerPoint that will be e-mailed to teachers. They need to bring their laptops if you want to use it in the Maker Space.
Note-You do not have to use the PowerPoint and maybe only show paintings and not go too far into Vincent's Depression, and his suicide. Although, years ago, the students thought it was very interesting that he cut off his ear. Which shows how mentally ill he was. 😉

Vincent van Gogh was born in Holland in
1853. By the age of 27, he had tried
teaching, shop work and preaching, all without success. Then, he decided to devote himself to art. But
he struggled to make a living and managed to sell only one painting during his
life. Today his pictures are worth millions.


Vincent Van Gogh painted thirty-seven
self-portraits, all but ten done while he was in Paris.


Vincent wrote to his sister that
she would probably thin the study of his “empty bedroom with a wooden bedstead,
the most unbeautiful thing of all.” To
Vincent, however, his room in Arles was important. It was the only house he had for himself, the
“yellow house” that would welcome Gauguin, Signac, and other artists seeking
the sun. Vincent carefully furnished the
room and decorated them with his own personal paintings and framed prints.


His pictures show a dramatic night sky
with twinkling stars and twisting trees.
The scenes have been built up out of layers of paint so thick, you can
see the brush marks. Van Gogh liked to
use strongly colored paint, often straight from the tube. His intense colors and swirling brush strokes
make his pictures vivid and full of movement.


Vincent Van Gogh Bio, and discussion of
(Calendar is at end of Post)
Please look at it before emailing or texting me to schedule a day to present
Here is the PowerPoint that will be e-mailed to teachers. They need to bring their laptops if you want to use it in the Maker Space.
Note-You do not have to use the PowerPoint and maybe only show paintings and not go too far into Vincent's Depression, and his suicide. Although, years ago, the students thought it was very interesting that he cut off his ear. Which shows how mentally ill he was. 😉


Starry Night - SPACE: The enormous cypress tree in the foreground
helps the viewer understand the arrangement of space. COLOR: The yellow highlights in the sky help move
your eye around the mostly blue composition.
LINE: Van Gogh uses spiraling
lines to create the swirling night sky.
TEXTURE: The artist uses visible
brushstrokes to create areas rich with texture.


Sadly, van Gogh suffered from mental
illness. In one famous incident, he cut
off part of his left ear after arguing with a friend. By 1889, he was in a mental hospital. He continued to paint furiously,
but
became more and more depressed. A year
later, he shot himself.
This is one of his last big
canvases. He painted this panorama only
weeks before his suicide. This is a
straightforward painting about a coming storm.
Harsh winds have darkened the sky, churned the clouds, frightened the
crows, and knocked the grass and wheat to the ground.
Vincent Van Gogh Bio, and discussion of
The Starry Night
Vincent Van Gogh was a Dutch painter who lived from 1853 to 1890.

He only painted for 10 years, but he created around 2100 works of art. He sold one single painting while he was alive, but later people loved his work so much that he is now thought of as an artistic genius, and he is one of the most famous artists of all time.
Vincent van Gogh was a very serious child, and he had trouble figuring out what to do with his life. He tried a number of jobs. At the age of 27 he decided to try being an artist. His brother Theo encouraged him and supported him the whole 10 years that he was producing art, since no one would buy his paintings.
Vincent van Gogh’s work changed over time, from very dark early work to very bright, vibrant later work.

Fishing boats

Bedroom in Arles
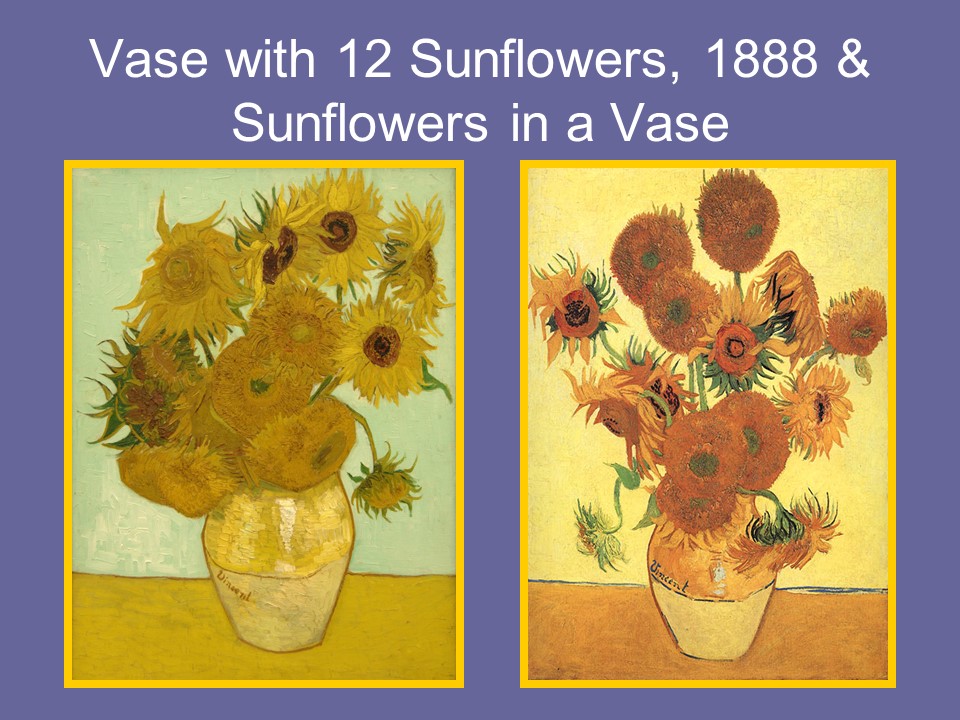
His style used thick brushstrokes of many colors layered over each other. The brushstrokes make swirls and patterns in some of his work, and make his paintings look very dramatic and lively. He painted portraits of people, many landscapes, and many still lifes. His sunflower and iris paintings are very famous.

Irises

Sunflowers
Van Gogh had poor health, and had mental illness of some kind. It was hard for him to live with other people, so he was lonely, and sad, and he couldn’t take care of himself properly. But some people who have studied van Gogh think that his amazing artwork was a result of his mental illness, and other physical problems he had. He looked at things a different way from other people, and he may have even seen things differently.
When Vincent van Gogh’s mental illness became too much for him to bear, he moved to an asylum so doctors could help him. He stayed there for two years, and while he lived there he created many works of art, including the painting we are going to be thinking about today – The Starry Night.

The Starry Night
Van Gogh painted pictures of the buildings, and the garden of the asylum, and the country outside. He loved the tall cypress trees that grew in the countryside around the asylum. He painted many pictures of the cypresses and olive trees, and the wheat fields, and the hills beyond. The view we see in the Starry Night is actually the view he saw out his window, with a few creative changes, and from the time of year he painted it, experts could tell the brightest star in the picture is actually the planet Venus.
Would the sky ever really look like the one in the Starry Night? Or is the artist painting what he sees in his imagination? Van Gogh actually didn’t like The Starry Night as much as other pictures of starry skies he had made. He thought it was not realistic enough.
Many art experts have looked at the painting and seen it different ways. The huge swirl in the sky could be a picture of a galaxy of stars, far away. It could be wind, or turmoil inside van Gogh’s head. The huge stars and swirls could be van Gogh’s way of showing that he thought there was tremendous power in the universe, and that people are only tiny in comparison. The brushstrokes he uses to paint the town and the land are very straight and orderly, but the brushstrokes he uses for the sky are wild and swirling, like they are all moving at once. You can see the tremendous feeling that van Gogh put into this painting.
Vincent van Gogh – Starry Night
Painting Project
Getting
ready
The supplies
should be waiting on the Art Lit cart, in the storage closet of the Maker Space
room. (Not in the kiln room, the other
storage room.) You can either reserve
the Maker Space room to use during your lesson, or you can take the cart to the
classroom. There is an elevator to reach
upstairs classrooms. These are the
supplies you will need:
*Plastic placemats
*Canvas boards (take enough for the
class – keep extras clean and put them back.
There will be a cart full
of them in the storage room.)
*Stencils (to share, and only if kids
really want them)
*Sketches of the main composition
elements in plastic sleeves, 1 per table
*Pencils
*Water jars, maybe 2 or 3 per table
*Plastic palettes, 1 for every 2 kids
to share
*Paintbrushes, 1 larger and one finer
for every kid
*Paper towels, 1 per kid
*Squeeze bottles of tempera paint
*Bucket with dish soap, sponges and
scrub brush
*A couple of rags to dry with
If you do the lesson in Maker Space, use the new drying racks
along the windows. If you are taking the
cart to a classroom, you’ll need to take one of the old drying racks, which we
will keep in the storage room where the cart is.
If there are
paintings in the drying racks and they feel dry enough, carefully stack them so
the racks will be empty. There should be
some clear plastic trash bags in the “finished artwork” box, along with tape
and a marker. Please bag the set of dry
paintings, and if you can tell which class they are from, please write the
teacher’s name on a piece of tape and stick it on the bag. Then put the whole bag into the “finished
artwork” box in the storage room.
Set up the
kids’ places in advance. Each place gets
a placemat, a pencil, a canvas board, and a paper towel. Fill water jars maybe 2/3 full of water and
set 2 or 3 on each table to be shared.
Put tempera paint into the palettes.
This may take some time. Use half
as many palettes as you have kids. They
will share. (If there are kids who have
issues that make this hard, they get their own palette, but don’t put as much
paint on it.) Use the squeeze bottles of
paint to put a good amount of every color in the holes on each palette. Don’t fill them too high to avoid spillage
and waste. Students can raise hands
during the project to ask for more of a certain color. Keep the palettes on the counter until after
the kids have penciled in their picture, then hand them out.
In the event
that the squeeze bottles are running too low on any color, the large jugs of
tempera are all on the shelves in the Art Lit storage closet, against the back
wall. You can refill them. FYI – tempera paint is not permanent, like
acrylic. It will wash off the brushes
fairly well. However, it could stain
clothing.
The
Project
(Things
you might want to say to the kids are in purple.) Try to think of questions to ask the kids as you go
along. Present Vincent van Gogh’s work
to the kids, then show them the samples of our project.
Part 1 – Sketching
Today
we are going to create our own versions of Vincent van Gogh’s painting called The Starry Night. It doesn’t have to look just like his. He painted 21 different versions of it
himself.
First
we will sketch in the main parts of the picture with pencil, and then we will
paint it.
(If you want to let kids use the stencils to put in
the main bits of the composition, you can tell them to pass the stencils around
to share. If you want them to do it all
themselves, don’t even mention the stencils.)
First
thing, write your name and your teacher’s name on the back of your canvas.
Now,
we’ll start by drawing in a horizon line from one side of the canvas to the
other. The horizon line separates the
land from the sky. It should have some
bumps in it to show hills on the earth. If you like, you can look at the sketch of the
painting to make it easier.
Next,
draw a tree shape in front of the horizon.
The tree should be large, to make it look like it is close to you. It doesn’t have to be a cypress tree.
Now,
draw the moon and stars. You only need
little circles for now. You’ll paint
them in later.
Draw
the swirling shapes in the sky. They may
look like the letter “S”, or like a spiral.
Last,
draw some little buildings on the land, to look like a town.
Part 2 – Painting
Hand out the
paint filled palettes. Tell the kids:
This
is tempera paint. It needs to go onto
the canvas thick, so you don’t need to get the brush wet before you put it in
the paint. You only need the water to
clean the brush between different colors.
You
may want to start by putting color onto large areas of your picture, like the
sky, or the tree, or the land. Try to
leave the spots for the moon and stars open until you paint them light
colors. If you paint them dark first
it’s harder to make them light later.
You
can mix colors too, on the edges of the palette or on the canvas itself.
If you fill in large areas first, you can go
over them later with more colors to make it look more interesting, or you can
try using little brushstrokes of many colors, like van Gogh did.
Don’t
paint the details until the end.
Make sure to
give the kids a 10-minute warning to finish up, and save a few minutes at the
end for clean up.
Afterwards
/ Clean up
Collect the
pencils.
Have the kids put their
finished paintings into the cardboard drying racks (if they can reach).
Then have the kids throw away their paper
towels, put their dirty paintbrushes in one bucket, and the paint palettes in
the other bucket. Please use the deep
sink in he Maker Space for all messy clean up like paint.
Once the
kids have left the Maker Space room with their teacher, do the rest of the
clean up. (Or take it back to the Maker
Space to do if you are in a classroom. Use
a bit of dish soap in the bucket to clean the brushes well. Leave them standing on end in the jars on the
cart for the next class.
Scrub out
the palettes with the scrub brush and put them back on the cart.
Wipe any
paint off the placemats with a damp sponge, and put them back into the carrying
bag on the cart. (You can wipe them with
a rag if they are too wet, then please spread out the drying rag to dry a bit.)

