
Pablo Picasso was probably the single most influential painter of the twentieth century. Often challenging established artistic ideas, his work has provided inspiration to many modem artists. Although his style varied throughout his long career, Picasso's vision was always original.
The son of an art teacher, Picasso was born in Malaga, Spain. He moved to France in 1904 to join the exciting art community that was forming in Paris. Although he retained a strong feeling for his homeland, he lived in France for the rest of his life.

His early career can be divided into two sections, the Blue Period and the Rose Period. In the first, he painted thin, discouraged-looking people in poor surroundings and used shades of blue, green, and gray to express their despair. 
The second period was marked by the use of warmer colors to portray happier subjects, such as clowns and acrobats. 
However, Picasso soon abandoned realistic portrayals altogether.
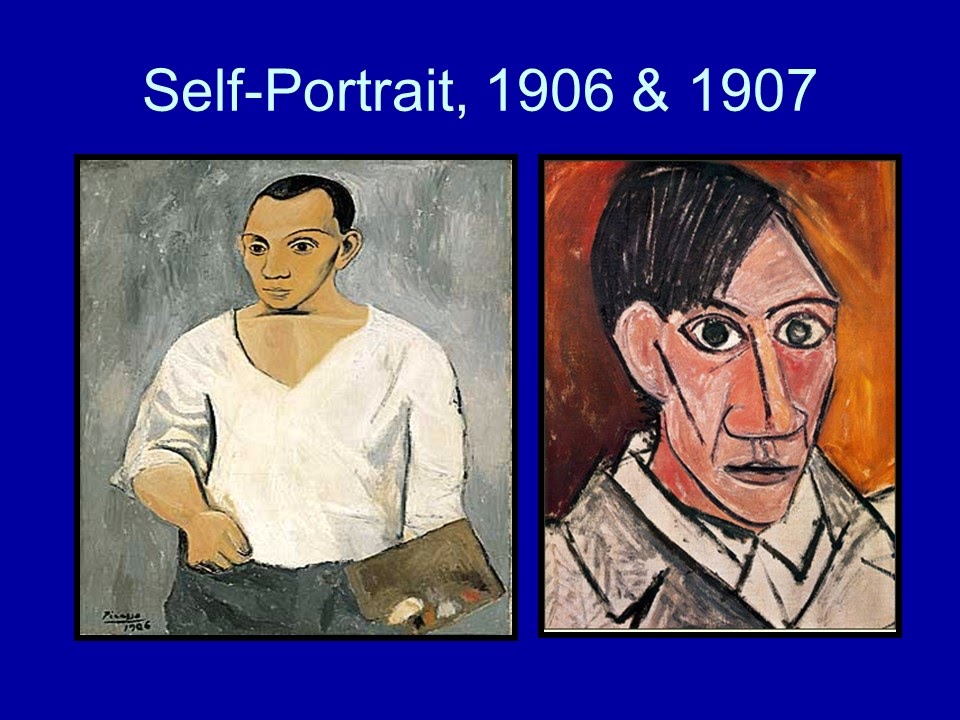
A 1907 painting, Les Demoiselles d'Avignon, was landmark artwork that broke with traditional art in every way.
The figures in this painting are distorted, fragmented, and barely recognizable as human.
This work was one of the first in an entirely new art style, later called Cubism. Picasso, with his friend George Braque, founded the Cubist movement. In this style, no attempt is made to recreate an illusion of reality. The artist aims instead to explore the geometric forms, lines, and planes of the subject.

Later, Picasso and other Cubists began to add actual objects to their paintings, inventing collage.

In the 1920's and 1930's, Picasso moved through still more changes in style.
Some paintings of this period show figures that seem to be changing before our eyes and images that call up subconscious ideas and feelings.


His greatest work of this period is Guernica, 1937, a painting reflecting his deeply felt anguish at the bombing of a town in his native Spain.
In this painting, Picasso employed distortion and symbolism to express terror and despair.


From the 1940's onward, Picasso continued to explore the themes and techniques he had established.

His work now included not only paintings but sculpture, ceramics, graphics, and drawings. He continued to work until his death at ninety-two, leaving behind a vast array of styles, themes, and works.
Below are the instructions for the project.
Asymmetry~ Not symmetrical, not the same on each side. Kid's words-
lop-sided
2 Draw an
oval or circle for the head. Make it LARGE. The portrait should take up most of
the paper
3 Draw a light
line down the center of the oval. This is a guideline for placing facial features.
4 Draw a light
line across the center of the oval. Also a guideline.
5 Add eyes, nose, mouth, ears, hair, etc.
6 Outline
each facial feature with black marker. Make some lines THICK and some THIN.
7 Color the
drawing with colored pencils. Use Bold and bright colors. Use Dark and light colors.
8 Cut out
the head/portrait. Cut the drawing up. Make use of Cubism's
geometrical shapes: triangles, squares, rectangles
9 Rearrange
the pieces to create a "Picasso" style face.
10 Leave
space at the bottom and put on a "Picasso" label. You may want students
to put the label on before gluing the pieces to ensure room for the label .
11 Glue the
pieces down onto the black paper.
Below are the instructions for the project.
Try to use these words for the project
Abstract~ Create art that is not a realistic image but an
imaginative, creative, expressive way to show the essence of something.
Kid's word~
weird, twisted, crazy, strange, fragmented, distorted.
Cubism~ A style of painting/drawing where you divide your portrait
or object into geometrical shapes.
1 Hand out
one piece of drawing paper and one piece of black paper. Have the students write
their name and class name on the BLACK piece of paper. The white paper will
be for the drawing and then it will be cut into pieces and glued onto the black paper.
geometrical shapes: triangles, squares, rectangles
Larger
pieces may work better. For Kinder-1st maybe
only 4-5 pieces.
*Leave
space between most of the pieces
*Put at least
two of the pieces UPSIDE down
*Overlap a
few pieces.