DALE CHIHULY~GLASS SCULPTOR
1941-PRESENT

Credited with elevating the craft of
glassmaking to a fine art, Chihuly offers a simple explanation for his success
in recasting glass as a popular artistic movement. “I
think people like to look at something they’ve
never seen before,”
he says. And that’s
what I try to do.”

Chihuly began developing his glassmaking
skills at the University of Wisconsin during the late 1960s, so he has been
developing glass pieces for more than 50 years! He is credited for elevating
the craft of glassmaking to a fine art.
His inventive sculptures – abstract baskets, colorful sea forms, lavish
towers and extravagant chandeliers appear in permanent collections of more than
200 museums worldwide and countless private collections.
He once said; “My
work revolves around a simple set of circumstances: fire, molten glass, human
breath, spontaneity, centrifugal force, gravity.” You will see from the slides a little bit of
the glassblowing technique. Basically,
they gather the hot, soft, glass onto a steel pipe from the oven. Then they shape the glass by rolling it over
the steel table. They add more glass by
repeating the gathering step from the oven, and they blow into the pipe to
create a bubble.

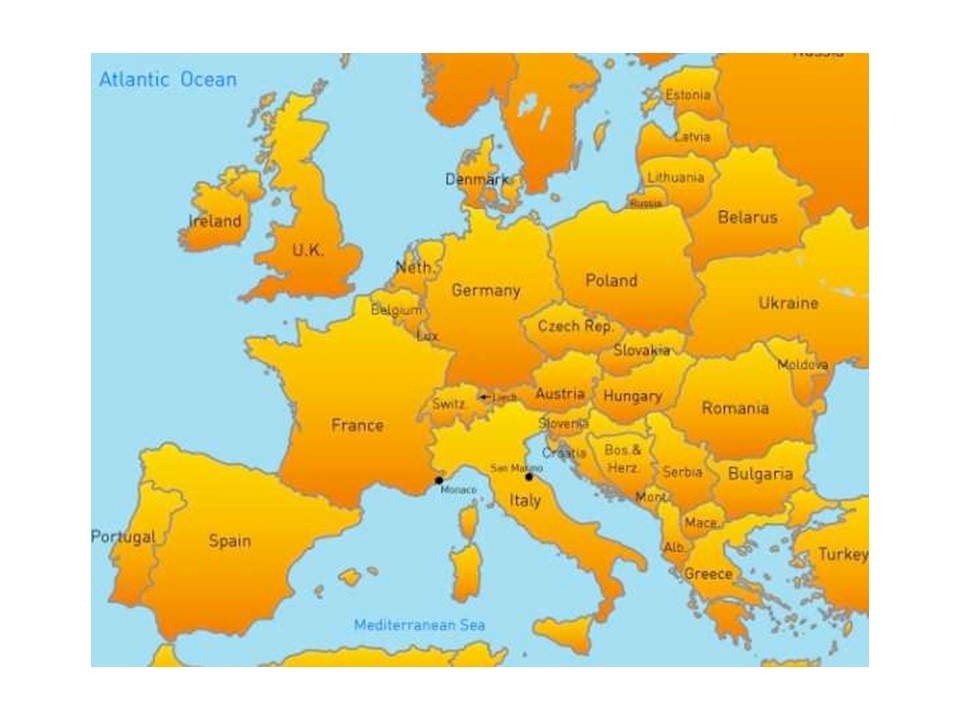
Looking at a map of the United
States we can see the states where he established his career – Washington,
Wisconsin, and Rhode Island. Italy
(referred to as the boot since it is shaped like one) would be east of Rhode
Island, on the other side of the Atlantic Ocean In Europe.

After time spent in Italy Chihuly learned
the importance of working as a team.
Here we see the artist working with glassmaker James Mongrain
in Chihuly’s
Seattle “hot
shop.” Why do you think it is referred to as a “hot
shop?” Yes, it takes heat, an oven, to soften the
glass so they can shape it.

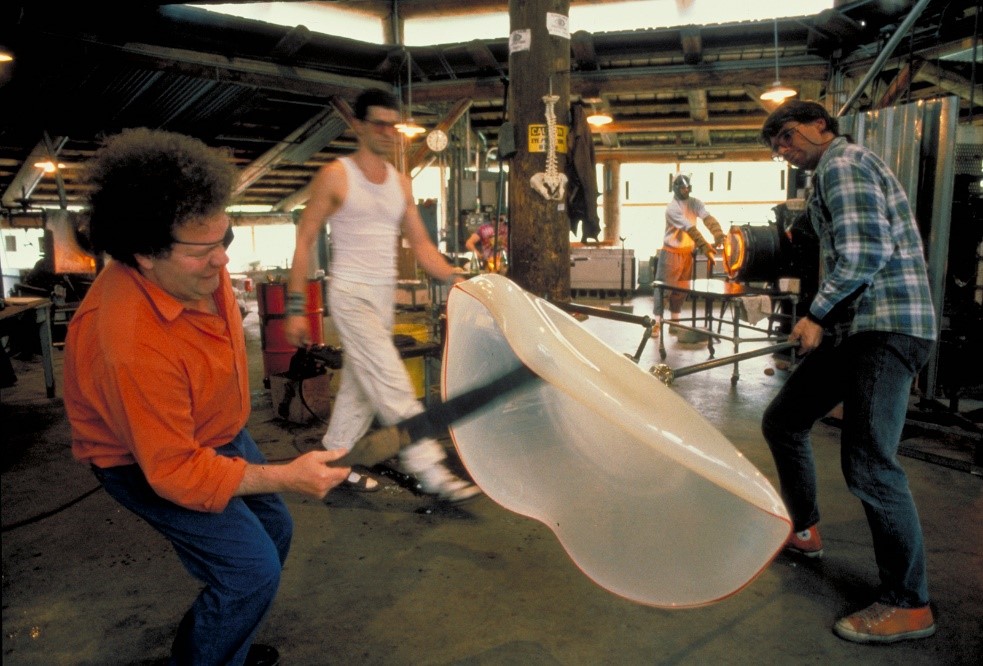
Working at his studio in Seattle, here we
see Chihuly giving directions to a fellow glassmaker and his team. He now prefers directing the process instead
of being the artist assisting or holding the pipe. How many men do you see in
the shop? Yes, five men. It does take a
team!
Let’s
take a moment to observe some of the details of his studio. Can anyone tell me
where the oven/furnace is? The molten glass which comes from the oven has to be
2,025 to 2125 Fahrenheit. That’s
hot!!! What do you notice on the wall? Yes, there are several drawings hung on
the wall. Chihuly has recorded his visual ideas on paper for his team to work
from. In the past, he used chalks or colored pencils for his drawings, now he
prefers to use acrylic paints in squeeze bottles. He usually lays his paper directly on the
floor and applies paint with vigorous gestures.
Does that sound like another artist you may know? Perhaps Jackson Pollock – “Action
Jackson.” Finally, notice the steel table (Marver). While holding the pipe, the artist rolls the the
molten glass on the table to help shape it.
The artist is continuously rotating the pipe until he gets the shape and
colors he wants to achieve.
Finally, why do you think they call it
glassblowing? Yes, the artist blows air into the steel tube at one end while the other end
holds the molten glass which is being expanded and shaped. Yes, kind of like blowing a bubble except
here they are using molten glass instead of bubble soap or chewing gum!

Chihuly
started his career by creating small pieces such as glass baskets
inspired by Native American baskets. Later, he made very large pieces like
chandeliers or pieces known as installations.
Here we see a large installation he did.
The Chihuly Bridge of Glass is a 500 foot
walkway outside the Museum of Glass in Tacoma, Washington – his hometown. He
has taken thousands of sea-like shapes of glass sculptures and imbedded them in
the glass ceiling of the walkway. Notice
all the various shapes and the colors. Light shining through the sculpture
creates beautiful and pleasing compositions.
Can you imagine walking under this?
Chihuly’s
work can be found in more than 200 hundred museum collections worldwide. He has been the recipient of many awards,
including twelve honorary doctorates and two fellowships from the National
Endowment for the Arts.
Chiluly has
created more than a dozen well-known series of works, among them Cylinders and
Baskets in the 1970s; Seaforms,
Macchia, Venetians, and Persians in the 1980s;Niijima Floats and Chandeliers in
the 1990s, and Fiori in the 2000s. He is
also celebrated for large architectural installations like we see here.

We are looking up at the Kirkpatrick
Memorial Tower found in the Oklahoma Museum of Art. Fun facts: It is 55 ft.
tall with a width of 7 ft 6 in. It has
2,100 individually blown glass parts.
The armature, which holds all of the pieces and dictates the form,
weighs 10,500 lbs. The glass pieces
weigh a total of 9,500 lbs. Total weight
is 10 tons (20,000 lbs).
It took 14 days to install. It is
hand cleaned once a year by a wall climber and takes 9 hours to clean. It is illuminated for 24 hours a day. This is one of many tower-type sculptures
Chihuly has made since 1996, of which no two are alike.


Speaking of nature….here we see Chihuly’s
The Sun, displayed at the Salk Institute for Biological Studies in La Jolla,
Calif.

Chihuly has created many water
sculptures. Here we see a boat filled
with glass balls.

Chihuly has had a lifelong fascination
for glasshouses which has grown into a series of exhibitions within botanical
settings. Here the glass master stands
amid his 2007 exhibit at the Phipps Conservatory and Botanical Gardens in
Pittsburgh.
“I
think people like to look at something they’ve
never seen before,”
he says.” “And
that’s
what I try to do.”
-Chihuly

Chihuly is not only a well known artist
in the US, but he is also internationally famous. Here Chihuly stands in 1996
beside his Isola di San Giacomo in Palude
Chandelier in Venice, Italy. Chihuly
created a number of glass sculptures that were later hung over the canals and
piazzas of Venice, so if you traveled by boat in a gondola one could look up
and see his beautiful sculptures. A
piazza is a place in the city where people gather - like we have in downtown
Portland – the Pioneer Square.


Templeton Elementary
School Art Literacy Program
Dale Chihuly Bio
Dale Chihuly
is an American artist who makes sculptures with blown glass. He is famous for his large, colorful
glassworks, and the techniques he uses to create them. He started out making all his glass himself,
but after awhile he trained a team of workers to do the work as he instructed
them. He and his assistants have made thousands
of pieces of art glass, some of which are used as artworks on their own, and
many which are combined into large installations of glassworks, in landscapes,
and inside public buildings.

Dale Chihuly
was born in 1941 in Tacoma Washington.
He first learned how to melt glass in college, and after college he
studied art and glassblowing at several US art schools and in Venice, Italy. In the 1970s Chihuly started a school for
glass artists. He later had two bad
accidents that left him unable to do the heavy work of lifting and shaping his
glass pieces himself, so that was why he started to use a team of assistants to
help him. That is also why he wears an
eye patch, and some people think he looks like a pirate.
Chihuly is
best known for his installations. An installation is a work of art made for a certain
place, usually a three dimensional sculpture or a group of sculptures, which is
large enough that people can walk around it, or inside of it, and it changes
the way people think about the space.
The picture next to Chihuly shows an installation he made called Persian
Ceiling. He made many large bright
colored flower shapes out of glass, and laid them on top of sheets of clear
glass. When light shines down through
it, the colors of the glass shine all over the room and the people in it.


Dale Chihuly went through quite
a few periods of doing glass in different shapes, or styles. He is very well known for the organic shapes
he used. Some of his work he called Seaforms, because it looked like
creatures from the sea, and other work looked like flowers or fantastic plants.


Dale Chihuly has made many
outdoor installations in gardens and museums around the world. Some of the work, like this one called The Sun, looks like one sculpture but is
made up of many pieces of glass combined together. Others are groupings of glass sculptures that
go together, like a bouquet of flowers, or a pile of floats, a more beautiful
version of the glass floats fishermen used to float their fishing nets on the
sea.


Making blown glass sculptures is very
complicated. The artist has to melt a
blob of glass in a furnace, then take it in and out of the heat many times to
shape it while it is hot enough to be soft, but cool enough to keep its shape. Artists add color to glass by mixing in
layers of colored glass over clear ones, or by adding bits of colored glass
during different parts of the process.
It is terribly hot work, next to the blazing furnace, and the large
pieces of glass are very heavy.
Today we
will be making small, colorful sculptures out of modeling clay. We will try to use organic shapes, like
Chihuly did. Think of sea shells,
flowers, and plants.
Templeton Elementary
School Art Literacy Program
Dale Chihuly – Colorful Organic
Sculpture Project
-Getting
ready
The tools
should be waiting on the Art Lit carts, in the storage closet of the Maker
Space room. You can either reserve the
Maker Space room to use during your lesson, or you can take a cart to the
classroom. Some supplies will need to be
taken from the storage room and added to the cart. These are the supplies you will need:
These should be on the cart:
Project folder
Pencils
Plastic sculpting tools
Box of short bits of wire
These will be on the third cart in the closet, for you to take for your
class:
1 baggie of Sculpy clay
Enough paper plates for your class to
use (1 per kid)
1 cardboard tray / box for finished
sculptures
This project requires some set up
time, and some time at the end as well.
Open up the bag of clay, and unwrap
each color from the plastic. Break each
large piece into 8 pieces. (They are
marked to divide into 4, then break those fourths in half.) Break each smaller, unmarked piece into 4
pieces. Set out enough plates for each
child in your class that day. Divide all
the clay bits onto the plates. Every
plate should have 6 or more pieces, in different colors (if I did the math
right). The kids don’t need a lot, as
our sculptures will be small, but they should have different colors to
use.
Add a pencil to each plate and hand
out the plates. Set a selection of tools
on each set of tables for the kids to share.
(Things
you might want to say to the kids are in purple.) Try to think of questions to ask the kids as you go
along. Present Dale Chihuly’s work to
the kids, then show them the samples of our project. Please don’t hand the samples around as they
may break if dropped or bent.
Today
we are going to create small, colorful sculptures out of clay. We are going to try to make “organic” shapes
like Dale Chihuly does with his glass.
Organic shapes mean shapes of natural things. So we are going to try to make shapes that
might look a bit like seashells, or plants, or flowers. After the sculptures are finished, they will
be baked in an oven to get hard, then you will be able to take them home before
Winter Break to use as decorations or whatever you want.
You
have some bits of Sculpy clay to work with.
It will seem hard at first, but as you squish it around your hands will
warm it up and it will get softer. You
can use the colors you got, or mix them a bit to make new colors. Chihuly mixes colors of glass all the
time. Soften the clay in your hands for
awhile before you try to mix colors together.
It’s okay to trade colors with other students as long as they want
to.
Once
you have your clay softened up, and maybe have mixed some colors yourself, you
can use the sculpture tools to cut and shape it if you want to. Be sure to press the pieces together well to
make them stick.
This project
is very open to what kids want to make, so there is not much instruction
required. Just circulate and keep an eye
on what they are doing, and offer help.
Encourage them not to make the pieces too thick, as they take much
longer to bake if they are thick.
Give the
kids a 5-minute warning to finish up.
As the kids
finish their sculptures, you will need to document which one belongs to which kid. We can’t write names on them. My
idea was to write the kid’s name in large letters on the paper plate next to
their sculpture, then take a picture of each with your phone. You could do maybe 4 at a time. (If you don’t have a phone, do whatever works
for you.) After documenting whose is
whose, you don’t need the paper plates anymore.
Carefully place the sculptures in the cardboard tray together to
transport them.
-Afterwards
/ Clean up
Collect the
pencils. Collect the sculpting
tools. Collect all the un-used Sculpy in
the plastic bag. Recycle the
plates. Put the extra Sculpy in the box
“Sculpy to be used later” in the storage room.
Put back un-used paper plates.
Putting in the wire hangers
For each sculpture,
you will need to bend a small bit of wire into a “U” shape, and stick it into
the best place on the sculpture to act as a hanger. The clay stays soft until it is baked, so if
you are taking them home yourself to bake and bring back, you can insert the
wires at home before baking. If you are
not able to bake them, please insert the wires and leave the tray of un-baked
sculptures for us to take home and bake.
If you leave a tray, you MUST put a note in it saying which class it is
from, and with your own name so we know who to contact to get them back to the
kids before Winter Break. (You are the
one with the pictures of whose is whose.)
Baking Instructions
If you are
going to bake the sculptures yourself, this is how to do it.
Have you stuck the
hanging wires in yet? You have to do
that before baking.
Pre-heat
your oven to 275 degrees. (No hotter, or
the clay may discolor.)
Cover a
metal baking sheet with aluminum foil or parchment paper. Place sculptures on the pan, not touching
each other, and place in the pre-heated oven.
Bake them
all for 15 minutes. Take the pan out of
the oven. Take the thinnest sculptures
off to cool. Continue baking the thicker
ones (or ones with thicker parts) for about 15 minutes more per additional ¼
inch thickness. (1/4” thick pieces get
15 minutes total, ½” thick get 30 minutes total, ¾” thick get 45 minutes total,
etc.)
Confer with your teacher
Please
discuss with your teacher what to do next.
Teachers may want to include the sculptures in paper bags going home as
Winter gifts for parents, or not.
Teachers will need to know whose sculpture is whose. (Perhaps you could tape paper tags around
them with names?) Please ask teachers
what they want, and make sure you get them back to teachers in time to go home
before Winter Break. There will be
sheets of pre-printed Art Lit labels in the storage area so you can take some
and put them onto the package, or tag, or whatever, so parents know it was an
Art Lit project. The labels are really
expensive, so if you have leftovers, put them back. Thanks.
Please let
teachers know we may have some Sculpy leftovers if a child missed Art Lit day
and wants to make one to take home. (It would need to be baked, of course.)
Thank you! Laura Cox November
2019